Swordman: Difference between revisions
Thershel (talk | contribs) (Created page with "<div style="text-align: center;"> <div style="display: inline-block; background: #990000; color: #ffffff; padding: 10px; border-radius: 5px; box-shadow: 0 2px 4px rgba(0, 0, 0, 0.1);"> '''W.I.P''' </div> </div> <div style="text-align: center;"> <div style="display: inline-block; background: #990000; color: #ffffff; padding: 10px; border-radius: 5px; box-shadow: 0 2px 4px rgba(0, 0, 0, 0.1);"> '''This is a contribution by players, for players, if you wis...") |
|||
| Line 331: | Line 331: | ||
== Change Job - 2-1 Transcendent == | == Change Job - 2-1 Transcendent == | ||
<br> | <br> | ||
<b><span style="color:#ff00ff;">[[https://wiki.adventuresro.com//v1/index.php/ | <b><span style="color:#ff00ff;">[[https://wiki.adventuresro.com//v1/index.php/Knight Swordman - - -> Knight 2-1 Transcendent Job]]</span></b> | ||
<br> | <br> | ||
</div> | </div> | ||
Latest revision as of 08:02, 20 July 2024
W.I.P
This is a contribution by players, for players, if you wish to correct and/or contribute any additional information or material please contact any Mentor or GM..
| Swordman Class | |
|---|---|
| Job Info | |
| Base Job:Novice | |
| Job Type:First | |
| Skills: 10 | |
| Platinum Skills: 3 | |
| Bonus stats at Job 50 | |
| STR: +7 | AGI: +2 | VIT: +4 | INT: +0 | DEX: +3 | LUK: +2 | |
Overview
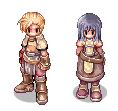
Swordmen are strong-willed fighters seeking to lead with their sword and shield. Though stubborn like the waves of the sea, swordmen are able to use their high attack skills to change the tide of the battlefield. Growing up in Prontera and its nearby town Izlude, they have learned that the best defense is the best offense.
Swordmen tend to have high ATK from swords and their skills boost the damage of these weapons. They can wear heavy armor and shield to boost their DEF and their high HP pool from skills and HP bonus significantly help with tanking mobs.
Class Data
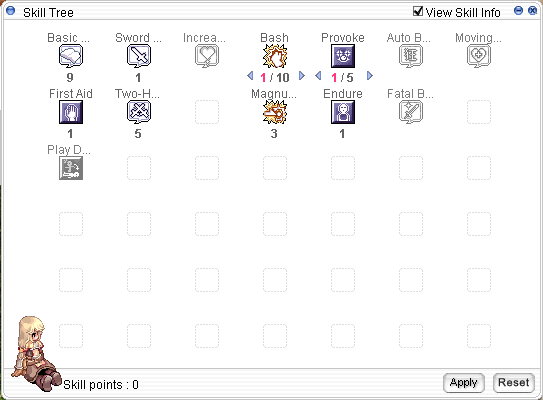
Skills
| Skill | Description | Levels | Type |
|---|---|---|---|
| Bash | Strikes a single target to deal ATK ×130~400% damage, with 5~50% additional accuracy. | 10 | Offensive |
| Endure | Resists flinching for up to 7 hits and for 10~37 seconds. Also increases MDEF by 1~10 when active. | 10 | Active |
| Increase HP Recovery | Increases HP Recovery while not moving. Also increases efficiency of Healing Items (HP) and Alchemist's Aid Potion by 10~100%. | 10 | Passive |
| Magnum Break | Causes a blast that pushes back by 2 cells and deals ATK ×120~300% Fire property damage to all enemies in a 5x5 area around the user, with 10~100% additional accuracy. | 10 | Offensive |
| Provoke | Increases a target's ATK by 5~32% and decreases its DEF by 10~55% with a 53~80% success chance. | 10 | Active |
| Sword Mastery | Increases ATK by 4~40 with swords and daggers. | 10 | Passive |
| Two-Handed Sword Mastery | Increases ATK by 4~40 with two-handed swords. | 10 | Passive |
Quest Skills
| Skill | Description | Levels | Type | Job Level Requirement |
|---|---|---|---|---|
| Berserk | Enrages the user, increasing ATK by 32% but decreasing DEF by 55% when HP drops below 25%. | 1 | Passive | 30 |
| Fatal Blow | Enables the skill Bash (level 6~10) to stun targets by chance. | 1 | Passive | 30 |
| HP Recovery While Moving | Enables HP Recovery even while moving. | 1 | Passive | 35 |
Leveling Spots & Tips
==== First, leave the passive skills for later, prioritize Bash and 40 dex at least ====
| Swordman's Leveling Route: | ||||
|---|---|---|---|---|
| Monsters | Recommended level | End level | Notes | Map |
Familiar Zombie Poporing Skeleton |
12 | 30 |
|
Area: Payon Cave
- Payon Cave F1 |
Spores Poporing Everything |
12 | 30 | Since spores give Strawberry and Blue herbs it is quite useful to get SP resources. | Area: Payon Forest
- Pay_fild01 |
Archer Skeleton Soldier Skeleton |
35 | 50 |
|
Area: Payon Forest
- Pay_fild01 |
Wolf Everything |
30 | 50+ |
|
Area: Payon Forest
- Pay_fild02 |
Bongun Munak |
40 | 60 |
|
Area: Payon Cave
- Payon Cave F3 |
Orc Zombie Orc Skeleton |
35 | 50+ |
|
ein_fild04
- Einbroch Field |
Orc Lady Orc Warrior |
40 | 60+ |
|
lou_fild01
- Louyang Field |
|
30 | 60+ |
|
mosk_dun01
- Moscovia Dungeon. |
Gear Progression
Start by buying a Sword at Izlude's Weapon Shop, then a Havier Sword or Two-Hand-Sword. Armor based on your progress and available zeny, but don't invest too much as you will have options later on.
Job 40 or higher
To change class you must at least be job 40 but is always recommended to be at 50.
Mastery is recommended, but not mandatory:
- Bash
- Sword Mastery
- Dex Stat
Build Example
==== As Swordman you'll focus on Bash only, STR, AGI and DEX.(Dex 30-40 just to hit monsters.) ====
Recommended Gear Progression (As Newbie)
Adventurers Guild
The adventurers set is an own set of the server, it is almost free, the only requirement is to perform the quests it has for you.
It is divided into three tiers, doubling its cost each time, getting the complete set without the weapon has a value of 20, 40 and 80.
We recommend getting the set as it is account bound and you can use it on your next characters, it is not tradeable.
| LEVEL RANGE | SET | Stats | Bonus | Weapon |
|---|---|---|---|---|
| Level 20 ~ 60 | Adventurer Hat l
|
|
Grants an additional 10% experience gained
|
|
| Level 61~85 | Adventurer Hat ll
|
|
Grants an additional 10% experience gained
|
Between LV61~85:
|
| Level 85~98 | Adventurer Hat lll
|
|
Grants an additional 10% experience gained
|
|


