Monk: Difference between revisions
Thershel (talk | contribs) (Created page with "<div style="text-align: center;"> <div style="display: inline-block; background: #990000; color: #ffffff; padding: 10px; border-radius: 5px; box-shadow: 0 2px 4px rgba(0, 0, 0, 0.1);"> '''W.I.P''' </div> </div> <div style="text-align: center;"> <div style="display: inline-block; background: #990000; color: #ffffff; padding: 10px; border-radius: 5px; box-shadow: 0 2px 4px rgba(0, 0, 0, 0.1);"> '''This is a contribution by players, for players, if you wis...") |
|||
| Line 87: | Line 87: | ||
| style="text-align:left; border: 1px solid #aaa;" | [[File:Throw Spirit Sphere.png|left]] Throw Spirit Sphere || style="border: 1px solid #aaa;" | Throws 1 spirit sphere at a single target to deals 8~16× damage. || style="border: 1px solid #aaa;" | 5 || style="background-color:#cccccc; border: 1px solid #aaa;" | Offensive | | style="text-align:left; border: 1px solid #aaa;" | [[File:Throw Spirit Sphere.png|left]] Throw Spirit Sphere || style="border: 1px solid #aaa;" | Throws 1 spirit sphere at a single target to deals 8~16× damage. || style="border: 1px solid #aaa;" | 5 || style="background-color:#cccccc; border: 1px solid #aaa;" | Offensive | ||
|} | |} | ||
<br> | |||
==== Quest Skills ==== | ==== Quest Skills ==== | ||
{| class="wikitable sortable" style="background-color:#f2f2f2; border: 1px solid #aaa; text-align:center; border-collapse: collapse;" | {| class="wikitable sortable" style="background-color:#f2f2f2; border: 1px solid #aaa; text-align:center; border-collapse: collapse;" | ||
| Line 105: | Line 103: | ||
[[File:MonkSkillTree.png]] | [[File:MonkSkillTree.png]] | ||
<br> | <br> | ||
== Leveling Route == | |||
<br> | <br> | ||
{|class="wikitable mw-collapsible mw-collapsed" style="width: 50%;" border="0" | {|class="wikitable mw-collapsible mw-collapsed" style="width: 50%;" border="0" | ||
|- | |- | ||
| Line 118: | Line 114: | ||
|- | |- | ||
| | | | ||
Les | |||
|| | || 30+ || 86+|| | ||
# | # [https://irowiki.org/classic/Finding_The_Moving_Island_Quest '''Moskovia Dungeon Quest'''] Needed | ||
# | # Fire Weapon | ||
|| Area: | # Keep all sharp leafs, they are useful for repeatable quests. | ||
- | || Area: mosk_dun01 | ||
- Les Forest | |||
|- | |- | ||
| | | | ||
Pitman | |||
|| 50 || 69 || | |||
|| | # Adventurers Guild Quest. | ||
- | # Fire Weapon | ||
# Hunt Porcellio & Noxious, maybe you are lucky and you can sell those cards. | |||
||Area: ein_dun01 | |||
- Einbech Mine Dungeon 1F | |||
|- | |- | ||
| | | | ||
Myst Case | |||
|| 45|| 70|| | |||
|| | # MVP Zone, take care. | ||
# | # Zeny early Zeny Spot. | ||
# | ||Area:xmas_dun02 | ||
- Toy Factory | |||
||Area: | |||
- | |||
|- | |- | ||
| | | | ||
High Orcs | |||
|| 70|| 90+ || | |||
|| | # Recommended to get a Water element, if you have endower(sage) use it in a weapon with racial damage against Humans/orcs. | ||
# | # Loot is a bit poor compared to other areas. | ||
# | # Try to hunt Orc Archers from time to time to get an Orc Bow and sell it. | ||
# Adv Guild Quest. | |||
- | ||gef_fild14 | ||
- Geffen Field | |||
|- | |- | ||
| | | | ||
Enchanted Peach Tree | |||
Zipper Bear | |||
|| | || 60 || 85+ || | ||
# | # Zeny $_$ | ||
# | # Fire Weapon | ||
|| | # | ||
- | ||Area:gon_dun01 | ||
- Shrine of Gonryun Queen | |||
|- | |||
| | |||
Pasanas | |||
|| 80+|| 95+|| | |||
# Nice Exp. | |||
# Good Zeny. | |||
# Evade Anubis. | |||
# Water Weapon needed | |||
||in_sphinx5 | |||
- Morroc Sphinx | |||
|- | |||
| | |||
Anolian | |||
|| 80+|| 95+|| | |||
# Nice Exp. | |||
# Anolian Skins for repeteable quest. | |||
# Adventurers Guild quest. | |||
# Oridecon farm. | |||
||cmd_fild03 | |||
- Zenhai Marsh | |||
|- | |- | ||
| | | | ||
Isilla | |||
|| | Vanberk | ||
|| 80+|| 95+|| | |||
# Nice Exp. | # Nice Exp. | ||
# | # Zeny. | ||
# | # Almost Everything is neutral, so do not use element here. | ||
||ra_sanc01 | |||
|| | - Rachel Sanctuary | ||
- | |||
|- | |- | ||
| | | | ||
Nightmare Terror | |||
|| | Earth Deleter | ||
Sky Deleter | |||
|| 80+|| 99|| | |||
# Nice Exp. | # Nice Exp. | ||
# | # Zeny. | ||
# | # Almost Everything is fire but Nightmare Terror shadow. | ||
# | # Pasana card is a must, recommended for duos, very expensive if you are going as newbie solo player | ||
|| | ||mag_dun02 | ||
- | - Magma Dungeon | ||
|- | |||
|} | |} | ||
| Line 193: | Line 218: | ||
==== Gear Progression ==== | ==== Gear Progression ==== | ||
Start by buying a | Start by buying a Mace in Prontera Seller. | ||
==== Job 40 or higher ==== | ==== Job 40 or higher ==== | ||
| Line 201: | Line 226: | ||
Mastery is recommended, but not mandatory: | Mastery is recommended, but not mandatory: | ||
* | * Iron Hand | ||
* | * Triple Attack | ||
* Dodge | |||
<br> | <br> | ||
| Line 212: | Line 238: | ||
== Equip Example == | == Equip Example == | ||
<br> | <br> | ||
<p style="color: Green; font-weight: bold;">===='' As Monk you'll focus on | <p style="color: Green; font-weight: bold;">===='' As Monk you'll focus on ASPD with combos or auto-attacks ''====</p> | ||
<br> | <br> | ||
| Line 226: | Line 252: | ||
{| class="wikitable" | {| class="wikitable" | ||
| Line 262: | Line 285: | ||
| |[[File: | | |[[File:AdventurerMace.png|200xpx|thumb|Adventurer Mace I]] Between lv 20 - 60 effects: | ||
* Attack +60 | * Attack +60 | ||
|- | |- | ||
| Line 296: | Line 315: | ||
|[[File: | | |[[File:AdventurerMace.png|200xpx|thumb|Adventurer Mace II]] Between lv 61 - 85 effects: | ||
* Attack +90 | * Attack +90 | ||
|- | |- | ||
| Line 328: | Line 345: | ||
|[[File: | | |[[File:AdventurerMace.png|200xpx|thumb|Adventurer Mace III]] Between lv 86 - 99 effects: | ||
* Attack +120 | * Attack +120 | ||
|} | |} | ||
<br> | <br> | ||
| Line 339: | Line 355: | ||
<table style="background-color:#f2f2f2; border: 1px solid #aaa; text-align:center; width: 10%; margin:0; border-collapse: collapse;"> | <table style="background-color:#f2f2f2; border: 1px solid #aaa; text-align:center; width: 10%; margin:0; border-collapse: collapse;"> | ||
<tr> | <tr> | ||
<td style="background-color:#a3cdd2; text-align:center; border: 1px solid #aaa; font-weight: bold;" colspan="2"> | <td style="background-color:#a3cdd2; text-align:center; border: 1px solid #aaa; font-weight: bold;" colspan="2">Doble - Triple Attack</td> | ||
</tr> | </tr> | ||
<tr> | <tr> | ||
<td style="border: 1px solid #aaa; padding: 8px;">'''STR:'''</td> | <td style="border: 1px solid #aaa; padding: 8px;">'''STR:'''</td> | ||
<td style="border: 1px solid #aaa; padding: 8px;"> | <td style="border: 1px solid #aaa; padding: 8px;">80-90</td> | ||
</tr> | </tr> | ||
<tr> | <tr> | ||
<td style="border: 1px solid #aaa; padding: 8px;">'''AGI:'''</td> | <td style="border: 1px solid #aaa; padding: 8px;">'''AGI:'''</td> | ||
<td style="border: 1px solid #aaa; padding: 8px;"> | <td style="border: 1px solid #aaa; padding: 8px;">99</td> | ||
</tr> | </tr> | ||
<tr> | <tr> | ||
| Line 363: | Line 379: | ||
<tr> | <tr> | ||
<td style="border: 1px solid #aaa; padding: 8px;">'''LUK:'''</td> | <td style="border: 1px solid #aaa; padding: 8px;">'''LUK:'''</td> | ||
<td style="border: 1px solid #aaa; padding: 8px;"> | <td style="border: 1px solid #aaa; padding: 8px;">1</td> | ||
</tr> | </tr> | ||
</table> | </table> | ||
<br> | <br> | ||
<p style="color: green; font-weight: bold;">===='' | {| style="padding: 1px; border-radius: 20%;overflow: hidden;" | ||
|- | |||
| [[File:ComboChampGif.gif|left]] | |||
|} | |||
<p style="color: green; font-weight: bold;">===='' Focused in double (With a hat or Sidewinder Card) and Triple Attack, full aspd and endow. ''====</p> | |||
<br> | <br> | ||
<table style="background-color:#f2f2f2; border: 1px solid #aaa; text-align:center; width: 10%; margin:0; border-collapse: collapse;"> | <table style="background-color:#f2f2f2; border: 1px solid #aaa; text-align:center; width: 10%; margin:0; border-collapse: collapse;"> | ||
<tr> | <tr> | ||
<td style="background-color:#a3cdd2; text-align:center; border: 1px solid #aaa; font-weight: bold;" colspan="2"> | <td style="background-color:#a3cdd2; text-align:center; border: 1px solid #aaa; font-weight: bold;" colspan="2">Chain Combo - Azura(Optional)</td> | ||
</tr> | </tr> | ||
<tr> | <tr> | ||
<td style="border: 1px solid #aaa; padding: 8px;">'''STR:'''</td> | <td style="border: 1px solid #aaa; padding: 8px;">'''STR:'''</td> | ||
<td style="border: 1px solid #aaa; padding: 8px;"> | <td style="border: 1px solid #aaa; padding: 8px;">80-90</td> | ||
</tr> | </tr> | ||
<tr> | <tr> | ||
| Line 394: | Line 413: | ||
<tr> | <tr> | ||
<td style="border: 1px solid #aaa; padding: 8px;">'''DEX:'''</td> | <td style="border: 1px solid #aaa; padding: 8px;">'''DEX:'''</td> | ||
<td style="border: 1px solid #aaa; padding: 8px;"> | <td style="border: 1px solid #aaa; padding: 8px;">30</td> | ||
</tr> | </tr> | ||
<tr> | <tr> | ||
| Line 402: | Line 421: | ||
</table> | </table> | ||
<br> | <br> | ||
<p style="color: green; font-weight: bold;">===='' | {| style="padding: 1px; border-radius: 20%;overflow: hidden;" | ||
|- | |||
| [[File:ChainComboMonkGif.gif|left]] | |||
|} | |||
<p style="color: green; font-weight: bold;">===='' With this build you'll be able to choose between spamming combos or finish them with Azure Strike ''====</p> | |||
<br> | <br> | ||
| Line 408: | Line 431: | ||
== Change Job - 2-1 Transcendent == | == Change Job - 2-1 Transcendent == | ||
<br> | <br> | ||
<b><span style="color:#ff00ff;">[[https://wiki.adventuresro.com//v1/index.php/Monk Monk - - -> Champion 2-1 Transcendent Job]]</span></b> | <b><span style="color:#ff00ff;">[[https://wiki.adventuresro.com//v1/index.php/Monk Monk - - -> Champion 2-1 Transcendent Job]]</span></b> | ||
<br> | <br> | ||
</div> | </div> | ||
Revision as of 23:47, 6 August 2024
W.I.P
This is a contribution by players, for players, if you wish to correct and/or contribute any additional information or material please contact any Mentor or GM..
| Monk Class | |
|---|---|
| Job Info | |
| Base Job:Novice | |
| Job Type:First | |
| Skills: 12 | |
| Platinum Skills: 2 | |
| Bonus stats at Job 50 | |
| STR: + 8 | AGI: + 7 | VIT: + 6 | INT: + 2 | DEX: + 4 | LUK: + 3 | |
Overview
Class Data
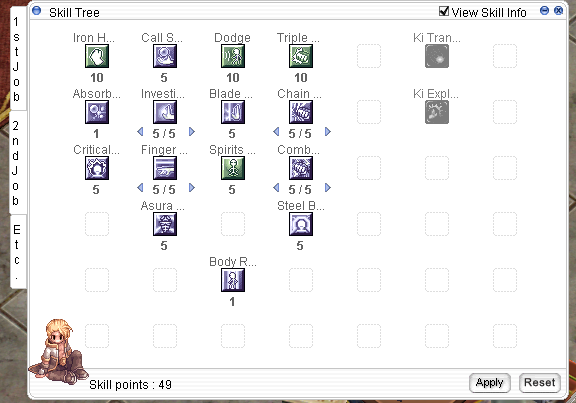
Skills
| Skill | Description | Levels | Type |
|---|---|---|---|
| Flee | Adds 1~15 Flee. | 10 | Passive |
| Fury | Increases critical rate of attacks by 10~20, also enables use of Guillotine Fist. | 5 | Supportive |
| Guillotine Fist | Deals a single attack consuming all of the caster's SP to deal massive damage. Requires at least 1 Spirit Spheres. You lose all SP and disables SP Regeneration for 3 seconds. | 5 | Offensive |
| Iron Fists | Increases damage done with knuckle class weapons by 3~30. | 10 | Passive |
| Mental Strength | For 30~150 seconds, reduce incoming damage you receive by 90%. You move and attack slower, and cannot use active skills. | 5 | Supportive |
| Occult Impaction | Consumes a single spirit sphere to attack a single target (ATK×1~5), damage is higher based on the target's DEF. | 5 | Offensive |
| Raging Quadruple Blow | Deals 4 hits in rapid succession to a single target at ATK×3~5, this skill is only usable in the delay after Raging Trifecta Blow. | 5 | Offensive |
| Raging Thrust | Deals up to 6~12× damage to a single target, but is only usable in the delay after Raging Quadruple Blow. | 5 | Offensive |
| Raging Trifecta Blow | Enables regular melee attacks to hit a target three times at ATK×1.2~3.0 instead of once by 30% chance. | 10 | Passive |
| Root | Catch an enemy's sword mid-attack in 0.5~1.3 seconds, locking the Monk and the attacker in place for 10 seconds. | 5 | Active |
| Snap | Instantly transports the Monk to a targeted cell as long as a direct path to that cell exists. | 1 | Active |
| Spiritual Cadence | Enables the Monk to regenerate HP and SP at anytime by sitting even if over 50% weight. | 5 | Passive |
| Spiritual Sphere Absorption | Allows the Monk to recover SP by absorbing previously summoned spirit spheres. | 1 | Supportive |
| Summon Spirit Sphere | Allows the Monk to summon 1~5 spirit spheres which enable many powerful attacks. | 5 | Supportive |
| Throw Spirit Sphere | Throws 1 spirit sphere at a single target to deals 8~16× damage. | 5 | Offensive |
Quest Skills
| Skill | Description | Levels | Type | Job Level Requirement |
|---|---|---|---|---|
| Spiritual Bestowment | Transfers one of the Monk's spirit spheres to another party member. | 1 | Supportive | None |
| Excruciating Palm | Hit a single target for 300% damage, all nearby targets are knocked back and may be stunned. | 1 | Offensive | None |
Leveling Route
| Monk's Leveling Route: | ||||
|---|---|---|---|---|
| Monsters | Recommended level | End level | Notes | Map |
|
Les |
30+ | 86+ |
|
Area: mosk_dun01
- Les Forest |
Pitman |
50 | 69 |
|
Area: ein_dun01
- Einbech Mine Dungeon 1F
|
Myst Case |
45 | 70 |
|
Area:xmas_dun02
- Toy Factory |
High Orcs |
70 | 90+ |
|
gef_fild14
- Geffen Field |
Enchanted Peach Tree Zipper Bear |
60 | 85+ |
|
Area:gon_dun01
- Shrine of Gonryun Queen |
Pasanas |
80+ | 95+ |
|
in_sphinx5
- Morroc Sphinx |
Anolian |
80+ | 95+ |
|
cmd_fild03
- Zenhai Marsh |
Isilla Vanberk |
80+ | 95+ |
|
ra_sanc01
- Rachel Sanctuary |
Nightmare Terror Earth Deleter Sky Deleter |
80+ | 99 |
|
mag_dun02
- Magma Dungeon |
Gear Progression
Start by buying a Mace in Prontera Seller.
Job 40 or higher
To change class you must at least be job 40 but is always recommended to be at 50.
Mastery is recommended, but not mandatory:
- Iron Hand
- Triple Attack
- Dodge
Equip Example
==== As Monk you'll focus on ASPD with combos or auto-attacks ====
Recommended Gear Progression (As Newbie)
Adventurers Guild
The adventurers set is an own set of the server, it is almost free, the only requirement is to perform the quests it has for you.
It is divided into three tiers, doubling its cost each time, getting the complete set without the weapon has a value of 20, 40 and 80.
We recommend getting the set as it is account bound and you can use it on your next characters, it is not tradeable.
| LEVEL RANGE | SET | Stats | Bonus | Weapon |
|---|---|---|---|---|
| Level 20 ~ 60 | Adventurer Hat l
|
|
Grants an additional 10% experience gained
|
Between lv 20 - 60 effects:
|
| Level 61~85 | Adventurer Hat ll
|
|
Grants an additional 10% experience gained
|
Between lv 61 - 85 effects:
|
| Level 85~98 | Adventurer Hat lll
|
|
Grants an additional 10% experience gained
|
Between lv 86 - 99 effects:
|
Build examples
| Doble - Triple Attack | |
| STR: | 80-90 |
| AGI: | 99 |
| VIT: | 1 |
| INT: | 1 |
| DEX: | 40 |
| LUK: | 1 |
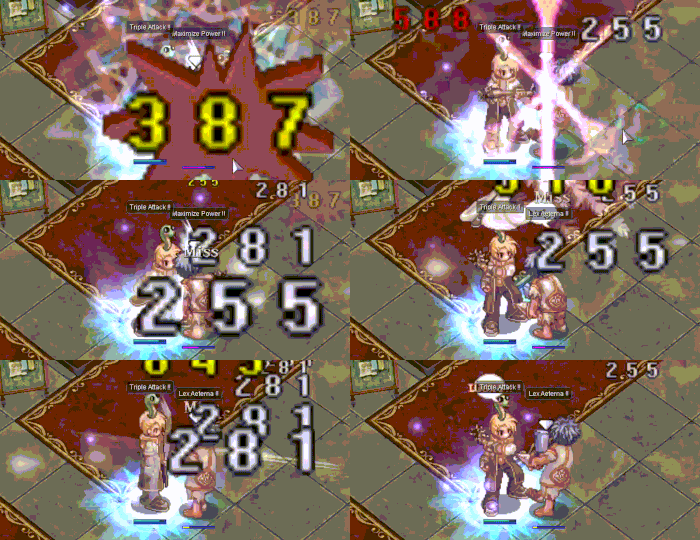
==== Focused in double (With a hat or Sidewinder Card) and Triple Attack, full aspd and endow. ====
| Chain Combo - Azura(Optional) | |
| STR: | 80-90 |
| AGI: | 80-90 |
| VIT: | 20-40 |
| INT: | 1 (base) |
| DEX: | 30 |
| LUK: | 1 |
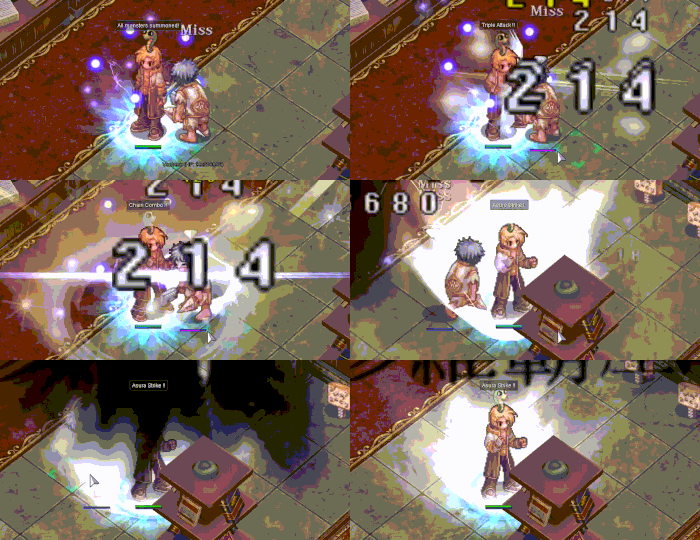
==== With this build you'll be able to choose between spamming combos or finish them with Azure Strike ====


